一. 衡量指标
用什么来衡量一个系统的负载能力呢?有一个概念叫做每秒请求数(Requests per second),指的是每秒能够成功处理请求的数目。比如说,你可以配置tomcat服务器的maxConnection为无限大,但是受限于服务器系统或者硬件限制,很多请求是不会在一定的时间内得到响应的,这并不作为一个成功的请求,其中成功得到响应的请求数即为每秒请求数,反应出系统的负载能力。
通常的,对于一个系统,增加并发用户数量时每秒请求数量也会增加。然而,我们最终会达到这样一个点,此时并发用户数量开始“压倒”服务器。如果继续增加并发用户数量,每秒请求数量开始下降,而反应时间则会增加。这个并发用户数量开始“压倒”服务器的临界点非常重要,此时的并发用户数量可以认为是当前系统的最大负载能力。
二. 相关因素
一般的,和系统并发访问量相关的几个因素如下:
- 带宽
- 硬件配置
- 系统配置
- 应用服务器配置
- 程序逻辑
- 系统架构
其中,带宽和硬件配置是决定系统负载能力的决定性因素。这些只能依靠扩展和升级提高。我们需要重点关注的是在一定带宽和硬件配置的基础上,怎么使系统的负载能力达到最大。
2.1 带宽
毋庸置疑,带宽是决定系统负载能力的一个至关重要的因素,就好比水管一样,细的水管同一时间通过的水量自然就少(这个比喻解释带宽可能不是特别合适)。一个系统的带宽首先就决定了这个系统的负载能力,其单位为Mbps,表示数据的发送速度。
2.2 硬件配置
系统部署所在的服务器的硬件决定了一个系统的最大负载能力,也是上限。一般说来,以下几个配置起着关键作用:
- cpu频率/核数:cpu频率关系着cpu的运算速度,核数则影响线程调度、资源分配的效率。
- 内存大小以及速度:内存越大,那么可以在内存中运行的数据也就越大,速度自然而然就快;内存的速度从原来的几百hz到现在几千hz,决定了数据读取存储的速度。
- 硬盘速度:传统的硬盘是使用磁头进行寻址的,io速度比较慢,使用了SSD的硬盘,其寻址速度大大较快。
很多系统的架构设计、系统优化,最终都会加上这么一句:使用ssd存储解决了这些问题。
可见,硬件配置是决定一个系统的负载能力的最关键因素。
2.3 系统配置
一般来说,目前后端系统都是部署在Linux主机上的。所以抛开win系列不谈,对于Linux系统来说一般有以下配置关系着系统的负载能力。
- 文件描述符数限制:Linux中所有东西都是文件,一个socket就对应着一个文件描述符,因此系统配置的最大打开文件数以及单个进程能够打开的最大文件数就决定了socket的数目上限。
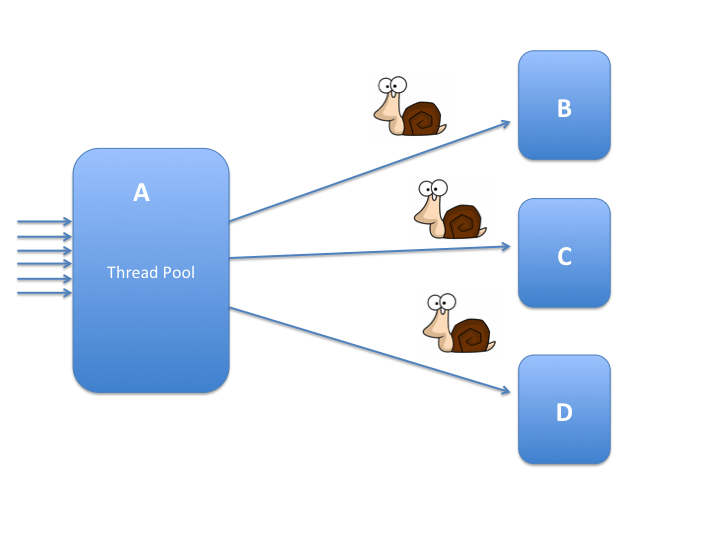
- 进程/线程数限制: 对于apache使用的prefork等多进程模式,其负载能力由进程数目所限制。对tomcat多线程模式则由线程数所限制。
- tcp内核参数:网络应用的底层自然离不开tcp/ip,Linux内核有一些与此相关的配置也决定了系统的负载能力。
2.3.1 文件描述符数限制
- 系统最大打开文件描述符数:/proc/sys/fs/file-max中保存了这个数目,修改此值
1234
临时性:echo1000000> /proc/sys/fs/file-max永久性:在/etc/sysctl.conf中设置 fs.file-max =1000000 - 进程最大打开文件描述符数:这个是配单个进程能够打开的最大文件数目。可以通过ulimit -n查看/修改。如果想要永久修改,则需要修改/etc/security/limits.conf中的nofile。
通过读取/proc/sys/fs/file-nr可以看到当前使用的文件描述符总数。另外,对于文件描述符的配置,需要注意以下几点:
- 所有进程打开的文件描述符数不能超过/proc/sys/fs/file-max
- 单个进程打开的文件描述符数不能超过user limit中nofile的soft limit
- nofile的soft limit不能超过其hard limit
- nofile的hard limit不能超过/proc/sys/fs/nr_open
2.3.2 进程/线程数限制
- 进程数限制:ulimit -u可以查看/修改单个用户能够打开的最大进程数。/etc/security/limits.conf中的noproc则是系统的最大进程数。
- 线程数限制
- 可以通过/proc/sys/kernel/threads-max查看系统总共可以打开的最大线程数。
- 单个进程的最大线程数和PTHREAD_THREADS_MAX有关,此限制可以在/usr/include/bits/local_lim.h中查看,但是如果想要修改的话,需要重新编译。
- 这里需要提到一点的是,Linux内核2.4的线程实现方式为linux threads,是轻量级进程,都会首先创建一个管理线程,线程数目的大小是受PTHREAD_THREADS_MAX影响的。但Linux2.6内核的线程实现方式为NPTL,是一个改进的LWP实现,最大一个区别就是,线程公用进程的pid(tgid),线程数目大小只受制于资源。
- 线程数的大小还受线程栈大小的制约:使用ulimit -s可以查看/修改线程栈的大小,即每开启一个新的线程需要分配给此线程的一部分内存。减小此值可以增加可以打开的线程数目。
2.3.3 tcp内核参数
在一台服务器CPU和内存资源额定有限的情况下,最大的压榨服务器的性能,是最终的目的。在节省成本的情况下,可以考虑修改Linux的内核TCP/IP参数,来最大的压榨服务器的性能。如果通过修改内核参数也无法解决的负载问题,也只能考虑升级服务器了,这是硬件所限,没有办法的事。
|
1
|
netstat -n | awk '/^tcp/ {++S[$NF]} END {for(a in S) print a, S[a]}' |
使用上面的命令,可以得到当前系统的各个状态的网络连接的数目。如下:
|
1
2
3
4
5
6
7
|
LAST_ACK 13SYN_RECV 468ESTABLISHED 90FIN_WAIT1 259FIN_WAIT2 40CLOSING 34TIME_WAIT 28322 |
这里,TIME_WAIT的连接数是需要注意的一点。此值过高会占用大量连接,影响系统的负载能力。需要调整参数,以尽快的释放time_wait连接。
一般tcp相关的内核参数在/etc/sysctl.conf文件中。为了能够尽快释放time_wait状态的连接,可以做以下配置:
- net.ipv4.tcp_syncookies = 1 //表示开启SYN Cookies。当出现SYN等待队列溢出时,启用cookies来处理,可防范少量SYN攻击,默认为0,表示关闭;
- net.ipv4.tcp_tw_reuse = 1 //表示开启重用。允许将TIME-WAIT sockets重新用于新的TCP连接,默认为0,表示关闭;
- net.ipv4.tcp_tw_recycle = 1 //表示开启TCP连接中TIME-WAIT sockets的快速回收,默认为0,表示关闭;
- net.ipv4.tcp_fin_timeout = 30 //修改系統默认的 TIMEOUT 时间。
这里需要注意的一点就是当打开了tcp_tw_recycle,就会检查时间戳,移动环境下的发来的包的时间戳有些时候是乱跳的,会把带了“倒退”的时间戳的包当作是“recycle的tw连接的重传数据,不是新的请求”,于是丢掉不回包,造成大量丢包。另外,当前面有LVS,并且采用的是NAT机制时,开启tcp_tw_recycle会造成一些异常,可见:http://www.pagefault.info/?p=416。如果这种情况下仍然需要开启此选项,那么可以考虑设置net.ipv4.tcp_timestamps=0,忽略掉报文的时间戳即可。
此外,还可以通过优化tcp/ip的可使用端口的范围,进一步提升负载能力。,如下:
- net.ipv4.tcp_keepalive_time = 1200 //表示当keepalive起用的时候,TCP发送keepalive消息的频度。缺省是2小时,改为20分钟。
- net.ipv4.ip_local_port_range = 10000 65000 //表示用于向外连接的端口范围。缺省情况下很小:32768到61000,改为10000到65000。(注意:这里不要将最低值设的太低,否则可能会占用掉正常的端口!)
- net.ipv4.tcp_max_syn_backlog = 8192 //表示SYN队列的长度,默认为1024,加大队列长度为8192,可以容纳更多等待连接的网络连接数。
- net.ipv4.tcp_max_tw_buckets = 5000 //表示系统同时保持TIME_WAIT的最大数量,如果超过这个数字,TIME_WAIT将立刻被清除并打印警告信息。默认为180000,改为5000。对于Apache、Nginx等服务器,上几行的参数可以很好地减少TIME_WAIT套接字数量,但是对于Squid,效果却不大。此项参数可以控制TIME_WAIT的最大数量,避免Squid服务器被大量的TIME_WAIT拖死。
2.4 应用服务器配置
说到应用服务器配置,这里需要提到应用服务器的几种工作模式,也叫并发策略。
- multi process:多进程方式,一个进程处理一个请求。
- prefork:类似于多进程的方式,但是会预先fork出一些进程供后续使用,是一种进程池的理念。
- worker:一个线程对应一个请求,相比多进程的方式,消耗资源变少,但同时一个线程的崩溃会引起整个进程的崩溃,稳定性不如多进程。
- master/worker:采用的是非阻塞IO的方式,只有两种进程:worker和master,master负责worker进程的创建、管理等,worker进程采用基于事件驱动的多路复用IO处理请求。mater进程只需要一个,woker进程根据cpu核数设置数目。
前三者是传统应用服务器apache和tomcat采用的方式,最后一种是nginx采用的方式。当然这里需要注意的是应用服务器和nginx这种做反向代理服务器(暂且忽略nginx+cgi做应用服务器的功能)的区别。应用服务器是需要处理应用逻辑的,有时候是耗cup资源的;而反向代理主要用作IO,是IO密集型的应用。使用事件驱动的这种网络模型,比较适合IO密集型应用,而并不适合CPU密集型应用。对于后者,多进程/线程则是一个更好地选择。
当然,由于nginx采用的基于事件驱动的多路IO复用的模型,其作为反向代理服务器时,可支持的并发是非常大的。淘宝tengine团队曾有一个测试结果是“24G内存机器上,处理并发请求可达200万”。
2.4.1 nginx/tengine
ngixn是目前使用最广泛的反向代理软件,而tengine是阿里开源的一个加强版nginx,其基本实现了nginx收费版本的一些功能,如:主动健康检查、session sticky等。对于nginx的配置,需要注意的有这么几点:
- worker数目要和cpu(核)的数目相适应
- keepalive timout要设置适当
- worker_rlimit_nofile最大文件描述符要增大
- upstream可以使用http 1.1的keepalive
典型配置可见:https://github.com/superhj1987/awesome-config/blob/master/nginx/nginx.conf
2.4.2 tomcat
tomcat的关键配置总体上有两大块:jvm参数配置和connector参数配置。
- jvm参数配置:
- 堆的最小值:Xms
- 堆的最大值:Xmx
- 新生代大小: Xmn
- 永久代大小: XX:PermSize:
- 永久代最大大小: XX:MaxPermSize:
- 栈大小:-Xss或-XX:ThreadStackSize
这里对于栈大小有一点需要注意的是:在Linux x64上ThreadStackSize的默认值就是1024KB,给Java线程创建栈会用这个参数指定的大小。如果把-Xss或者-XX:ThreadStackSize设为0,就是使用“系统默认值”。而在Linux x64上HotSpot VM给Java栈定义的“系统默认”大小也是1MB。所以普通Java线程的默认栈大小怎样都是1MB。这里有一个需要注意的地方就是java的栈大小和之前提到过的操作系统的操作系统栈大小(ulimit -s):这个配置只影响进程的初始线程;后续用pthread_create创建的线程都可以指定栈大小。HotSpot VM为了能精确控制Java线程的栈大小,特意不使用进程的初始线程(primordial thread)作为Java线程。
其他还要根据业务场景,选择使用那种垃圾回收器,回收的策略。另外,当需要保留GC信息时,也需要做一些设置。
典型配置可见:https://github.com/superhj1987/awesome-config/blob/master/tomcat/java_opts.conf
- connector参数配置
- protocol: 有三个选项:bio;nio;apr。建议使用apr选项,性能为最高。
- connectionTimeout:连接的超时时间
- maxThreads:最大线程数,此值限制了bio的最大连接数
- minSpareThreads: 最大空闲线程数
- acceptCount:可以接受的最大请求数目(未能得到处理的请求排队)
- maxConnection: 使用nio或者apr时,最大连接数受此值影响。
典型配置可见:https://github.com/superhj1987/awesome-config/blob/master/tomcat/connector.conf
一般的当一个进程有500个线程在跑的话,那性能已经是很低很低了。Tomcat默认配置的最大请求数是150。当某个应用拥有250个以上并发的时候,应考虑应用服务器的集群。
另外,并非是无限调大maxTreads和maxConnection就能无限调高并发能力的。线程越多,那么cpu花费在线程调度上的时间越多,同时,内存消耗也就越大,那么就极大影响处理用户的请求。受限于硬件资源,并发值是需要设置合适的值的。
对于tomcat这里有一个争论就是:使用大内存tomcat好还是多个小的tomcat集群好?(针对64位服务器以及tomcat来说)
其实,这个要根据业务场景区别对待的。通常,大内存tomcat有以下问题:
- 一旦发生full gc,那么会非常耗时
- 一旦gc,dump出的堆快照太大,无法分析
因此,如果可以保证一定程度上程序的对象大部分都是朝生夕死的,老年代不会发生gc,那么使用大内存tomcat也是可以的。但是在伸缩性和高可用却比不上使用小内存(相对来说)tomcat集群。
使用小内存tomcat集群则有以下优势:
- 可以根据系统的负载调整tc的数量,以达到资源的最大利用率,
- 可以防止单点故障。
2.4.3 数据库
mysql
mysql是目前最常用的关系型数据库,支持复杂的查询。但是其负载能力一般,很多时候一个系统的瓶颈就发生在mysql这一点,当然有时候也和sql语句的效率有关。比如,牵扯到联表的查询一般说来效率是不会太高的。
影响数据库性能的因素一般有以下几点:
- 硬件配置:这个无需多说
- 数据库设置:max_connection的一些配置会影响数据库的连接数
- 数据表的设计:使用冗余字段避免联表查询;使用索引提高查询效率
- 查询语句是否合理:这个牵扯到的是个人的编码素质。比如,查询符合某个条件的记录,我见过有人把记录全部查出来,再去逐条对比
- 引擎的选择:myisam和innodb两者的适用场景不同,不存在绝对的优劣
抛开以上因素,当数据量单表突破千万甚至百万时(和具体的数据有关),需要对mysql数据库进行优化,一种常见的方案就是分表:
- 垂直分表:在列维度的拆分
- 水平分表:行维度的拆分
此外,对于数据库,可以使用读写分离的方式提高性能,尤其是对那种读频率远大于写频率的业务场景。这里一般采用master/slave的方式实现读写分离,前面用程序控制或者加一个proxy层。可以选择使用MySQL Proxy,编写lua脚本来实现基于proxy的mysql读写分离;也可以通过程序来控制,根据不同的sql语句选择相应的数据库来操作,这个也是笔者公司目前在用的方案。由于此方案和业务强绑定,是很难有一个通用的方案的,其中比较成熟的是阿里的TDDL,但是由于未全部开源且对其他组件有依赖性,不推荐使用。
现在很多大的公司对这些分表、主从分离、分布式都基于mysql做了自己的二次开发,形成了自己公司的一套分布式数据库系统。比如阿里的Cobar、网易的DDB、360的Atlas等。当然,很多大公司也研发了自己的mysql分支,比较出名的就是姜承尧带领研发的InNoSQL。
redis
当然,对于系统中并发很高并且访问很频繁的数据,关系型数据库还是不能妥妥应对。这时候就需要缓存数据库出马以隔离对mysql的访问,防止mysql崩溃。
其中,redis是目前用的比较多的缓存数据库(当然,也有直接把redis当做数据库使用的)。redis是单线程基于内存的数据库,读写性能远远超过mysql。一般情况下,对redis做读写分离主从同步就可以应对大部分场景的应用。但是这样的方案缺少ha,尤其对于分布式应用,是不可接受的。目前,redis集群的实现方案有以下几个:
- redis cluster:这是一种去中心化的方案,是redis的官方实现。是一种非常“重”的方案,已经不是Redis单实例的“简单、可依赖”了。目前应用案例还很少,貌似国内的芒果台用了,结局不知道如何。
- twemproxy:这是twitter开源的redis和memcached的proxy方案。比较成熟,目前的应用案例比较多,但也有一些缺陷,尤其在运维方面。比如无法平滑的扩容/缩容,运维不友好等。
- codis: 这个是豌豆荚开源的redis proxy方案,能够兼容twemproxy,并且对其做了很多改进。由豌豆荚于2014年11月开源,基于Go和C开发。现已广泛用于豌豆荚的各种Redis业务场景。现在比Twemproxy快近100%。目前据我所知除了豌豆荚之外,hulu也在使用这套方案。当然,其升级项目reborndb号称比codis还要厉害。
2.5 系统架构
影响性能的系统架构一般会有这几方面:
- 负载均衡
- 同步 or 异步
- 28原则
2.5.1 负载均衡
负载均衡在服务端领域中是一个很关键的技术。可以分为以下两种:
- 硬件负载均衡
- 软件负载均衡
其中,硬件负载均衡的性能无疑是最优的,其中以F5为代表。但是,与高性能并存的是其成本的昂贵。所以对于很多初创公司来说,一般是选用软件负载均衡的方案。
软件负载均衡中又可以分为四层负载均衡和七层负载均衡。 上文在应用服务器配置部分讲了nginx的反向代理功能即七层的一种成熟解决方案,主要针对的是七层http协议(虽然最新的发布版本已经支持四层负载均衡)。对于四层负载均衡,目前应用最广泛的是lvs。其是阿里的章文嵩博士带领的团队所研发的一款linux下的负载均衡软件,本质上是基于iptables实现的。分为三种工作模式:
- NAT: 修改数据包destination ip,in和out都要经过lvs。
- DR:修改数据包mac地址,lvs和realserver需要在一个vlan。
- IP TUUNEL:修改数据包destination ip和源ip,realserver需要支持ip tunnel协议。lvs和realserver不需要在一个vlan。
三种模式各有优缺点,目前还有阿里开源的一个FULL NAT是在NAT原来的DNAT上加入了SNAT的功能。
此外,haproxy也是一款常用的负载均衡软件。但限于对此使用较少,在此不做讲述。
2.5.2 同步 or 异步
对于一个系统,很多业务需要面对使用同步机制或者是异步机制的选择。比如,对于一篇帖子,一个用户对其分享后,需要记录用户的分享记录。如果你使用同步模式(分享的同时记录此行为),那么响应速度肯定会受到影响。而如果你考虑到分享过后,用户并不会立刻去查看自己的分享记录,牺牲这一点时效性,可以先完成分享的动作,然后异步记录此行为,会提高分享请求的响应速度(当然,这里可能会有事务准确性的问题)。有时候在某些业务逻辑上,在充分理解用户诉求的基础上,是可以牺牲某些特性来满足用户需求的。
这里值得一提的是,很多时候对于一个业务流程,是可以拆开划分为几个步骤的,然后有些步骤完全可以异步并发执行,能够极大提高处理速度。
2.5.3 28原则
对于一个系统,20%的功能会带来80%的流量。这就是28原则的意思,当然也是我自己的一种表述。因此在设计系统的时候,对于80%的功能,其面对的请求压力是很小的,是没有必要进行过度设计的。但是对于另外20%的功能则是需要设计再设计、reivew再review,能够做负载均衡就做负载均衡,能够缓存就缓存,能够做分布式就分布式,能够把流程拆开异步化就异步化。
当然,这个原则适用于生活中很多事物。
三. 一般架构
一般的Java后端系统应用架构如下图所示:LVS+Nginx+Tomcat+MySql/DDB+Redis/Codis

其中,虚线部分是数据库层,采用的是主从模式。也可以使用redis cluster(codis等)以及mysql cluster(Cobar等)来替换。
from:http://www.rowkey.me/blog/2015/09/09/load-analysis/